How Assets Work
 Updated
by
Janelle Heuton
Updated
by
Janelle Heuton
Assets are core to Ops Hub. An asset is a physical item, like a property location, meter, or fire hydrant, which exists in the city and around work is tracked. All Assets live in the Asset Repository. Assets are associated to Work Orders, Permits, Inspections and more. Over time, this creates a valuable historical record of what Assets you have and what has been done to them.
Asset Repository
You can view a master list of all Asset Types in Operations > Asset Repository. The Asset Repository shows Assets and Asset Types.
Asset Types
The Asset Types tab contains all the Asset Types you have configued along with Asset Count, Department, Status, and the number of Projects, Work Orders, and Code Enforcement Cases created for each Asset Type. If you have Maps Hub enabled, you can also choose whether the asset should be added as a layer on the map and configure map properties.
Use the search bar and filters to find a specific Asset Type. You can add new Asset Types or select an Asset Type to view all the individual Assets of that type.
Configuring Asset Types
Each Asset Type has details, or attributes, associated with it. There are core attributes that are the same across all assets, and there may be unique attributes specific to one type of asset. For example, meters may come in different types such as demand or parallel which will require additional information. You may want to track hydrant cap color or water main size. You have the ability to configure attributes for each asset type and determine whether they are required or not.
To configure a new Asset Type, click Add New Asset Type.
- Asset Type Name. Enter the name of the Asset Type you are creating.
- Department. Add the Department for the Asset Type. If the Department doesn't exist, you can add and manage Departments in Operations > Settings > Departments.
- Status. By default, Asset Types are active. You may choose to archive an Asset Type that is no longer needed by setting the status as Archived.
- Core Attributes. You'll see a list of core attributes that will default for all Asset Types.
- Custom Attributes. Add attributes that should be collected in addition to the Core Attributes. Include the Field Name, Field Type, Description, and whether that attribute will be required or not when creating a Asset of that Asset Type. Use the Field Type field to determine the formatting for that attribute.
- Text. This is an ope- text field and may be used for attributes like descriptors or names such as manufacturer, make, model, etc.
- Number. This may be used for attributes like main line size or diameter.
- Amount(s). This may be used to track a dollar amount such as replacement cost.
- Date. This may be used for attributes like Installation Date or Replacement Date.
- Option List. This is used to create a dropdown where a user can select one of a set of defined options. You can add the options the dropdown should include.
- Phone. This is used to collect phone numbers.
- Address. This is used to collect addresses.
- Add Asset as layer. If you have Maps Hub, toggle this on to make the asset available as a layer that can be viewed in Maps Hub.
- Click Add to add the Asset Type.

Once the Asset Type has been created, you can select the Asset Type from the Asset Repository to add individual Assets one at a time or batch import multiple Assets.
Assets
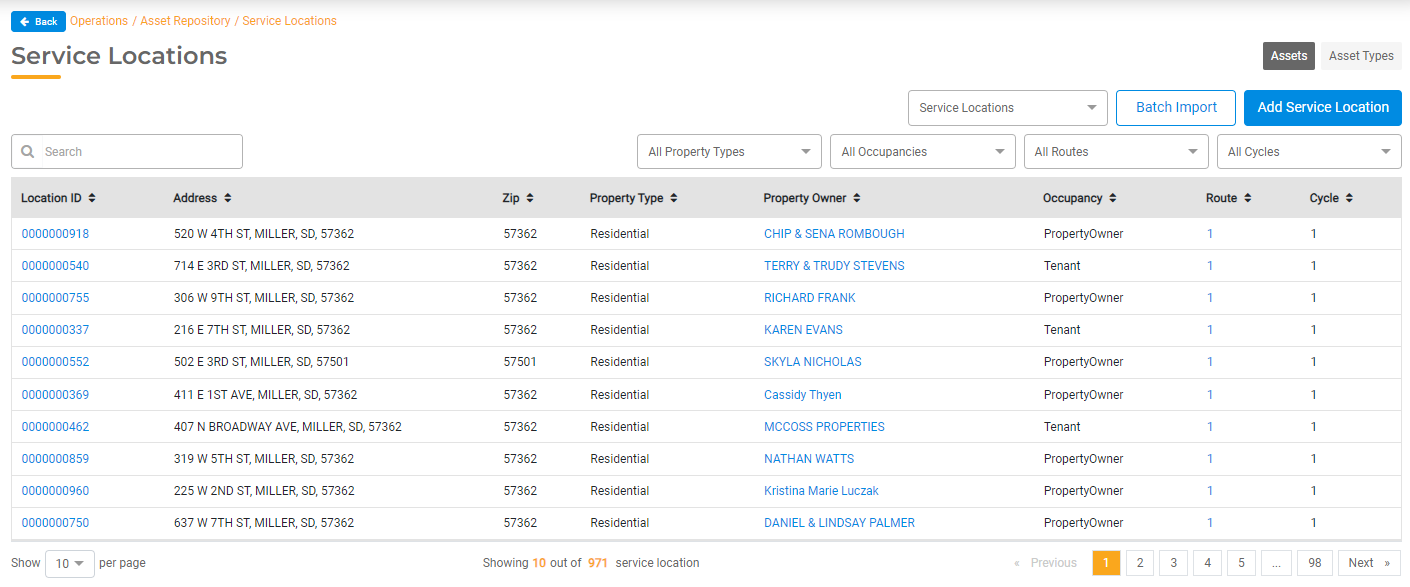
To drill down and see a list of Assets of a specific type, such as Meters or Service Locations, select the Assets Tab or click on the Count link from the Asset Types page. This will display a list of all Assets of that type in table view. You can search for a specific Asset using the Search Menu or use the filter to filter by Asst Type. To open the individual Asset's details, select the Asset from this list.
Asset Details
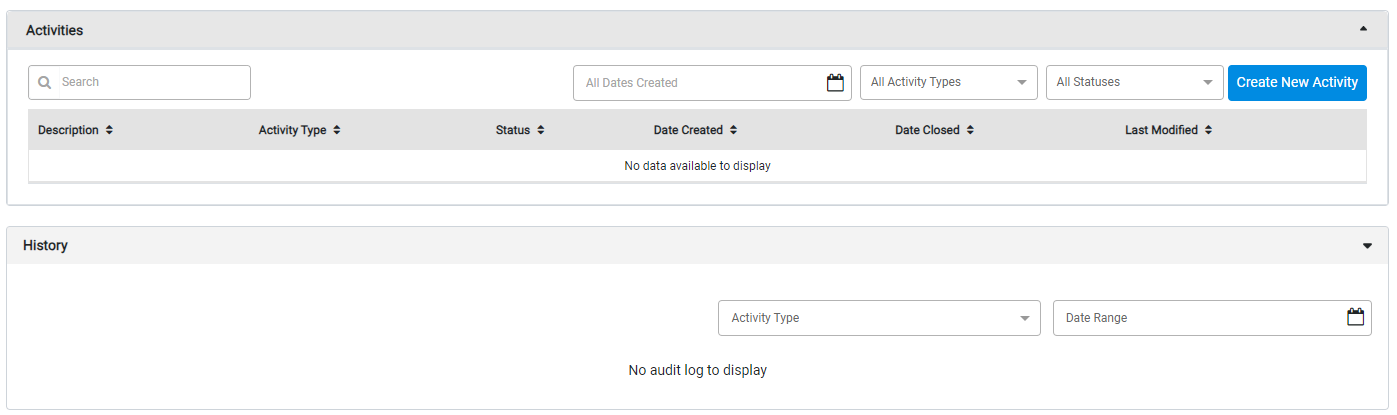
Select an individual Asset from the Asset Master list to view details of that Asset including attributes, work history, media, and more. You can also click Create New Activity to create a new Work Order, Inspection, Permit, or Project for that Asset.
Adding Assets
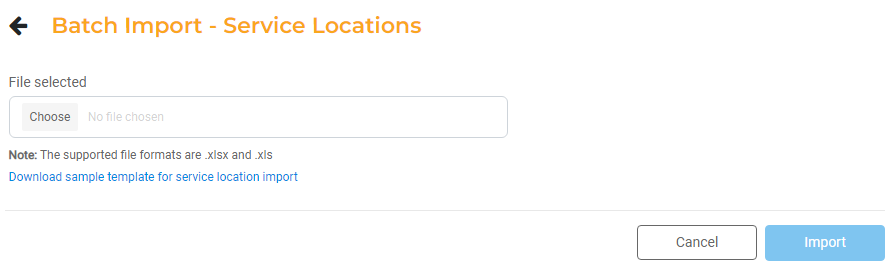
You can add Assets one at a time by selecting Add New. You can also batch import Assets of a single type. Select Batch Import to upload a file.
The file must be formatted in a specific way for the batch upload. Click the Download sample template link to download a sample file with the necessary format. You can use this file to add all the Assets you wish and save the file. You must keep the format the same as the same file: leave the column headers as-is and add the Asset Details below.
Upload the updated file by clicking Choose file and selecting the Excel spreadsheet from your computer. Click Import to complete the batch import.
Special Asset Types
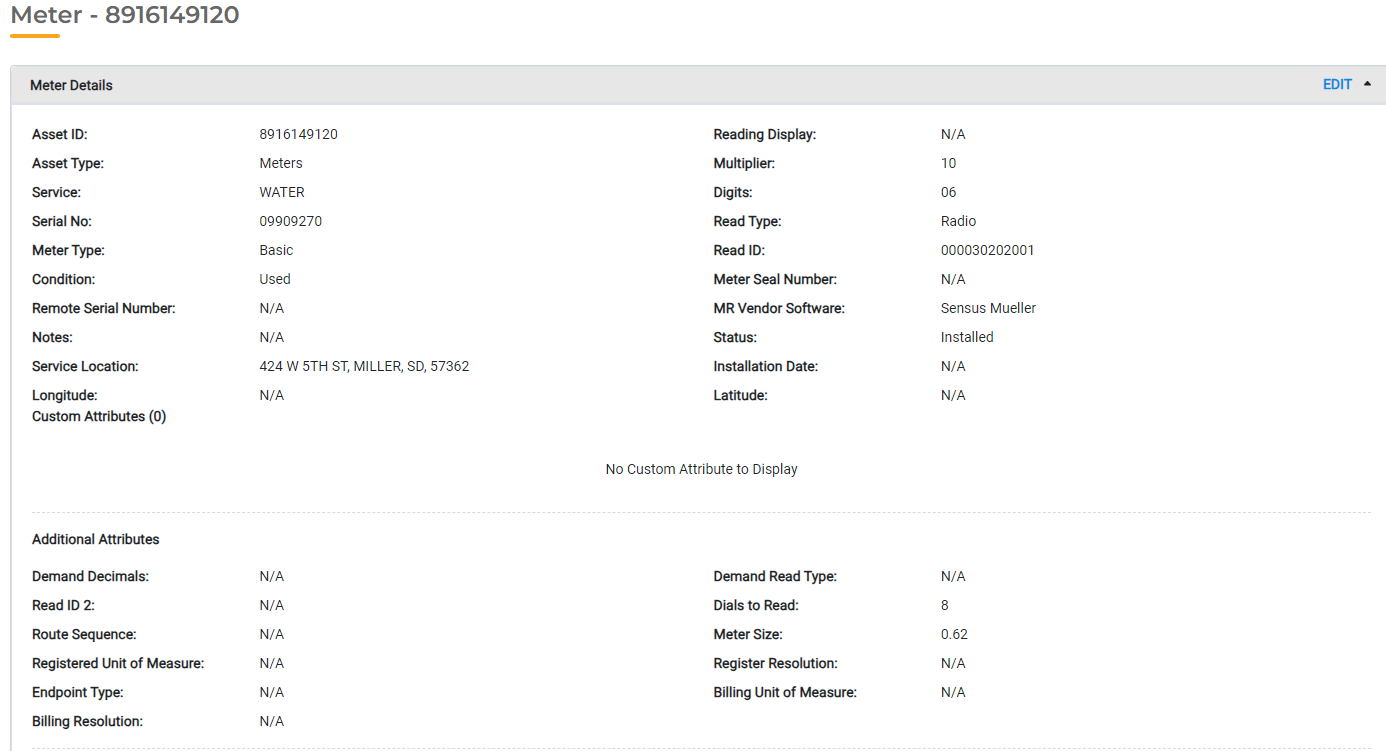
Meters
Meters are an Asset Type that must be formatted a very specific way to support meter readings in UB Hub. The Meter Type will determine additional information that must be tracked. For example, a Parallel Meter will require different information than a Demand Meter, but both require certain attributes to work properly.
You may add additional attributes to collect as needed.
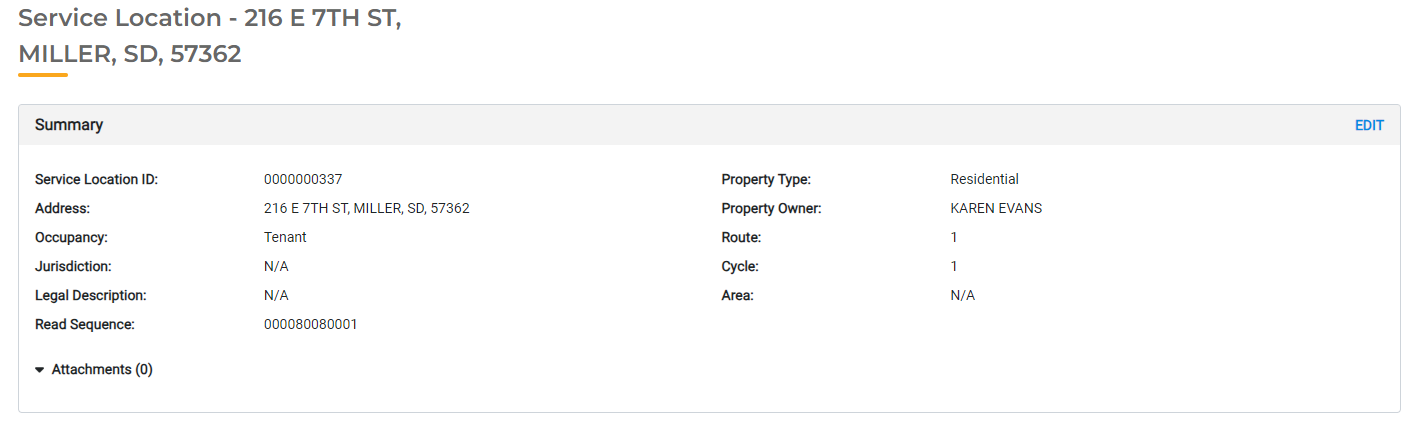
Service Locations
Service Locations are another Asset Type that must be formatted specifically for UB Hub. Service Locations will always include Occupancy, Read Sequence, Property Type, Property Owner, Route, Cycle, and Area. You may add additional attributes to collect as needed. For example, you may choose to track Parcel ID or Zoning for each Service Location.
When batch importing Service Locations, download the sample template and then populate the Excel spreadsheet with all your Service Locations. Once the Excel spreadsheet has been updated, you can then upload the file by clicking Choose and selecting the file from your computer.
The uploaded file must be formatted exactly like the sample. If there are any modifications, you will see an error screen when completing the upload that will provide specific details on what needs to be fixed before the file can be uploaded successfully.