How to Complete Property Location Cleanup in SimpleCity
Updated
by
Janelle Heuton
Before SimpleCity Utility Billing data can be migrated to Utility Billing Hub, you first need to complete the Property Location Cleanup process. This process verifies the Service Addresses within your Agency so those addresses can be imported into SimpleCity.
How can I tell if I need to run this process?
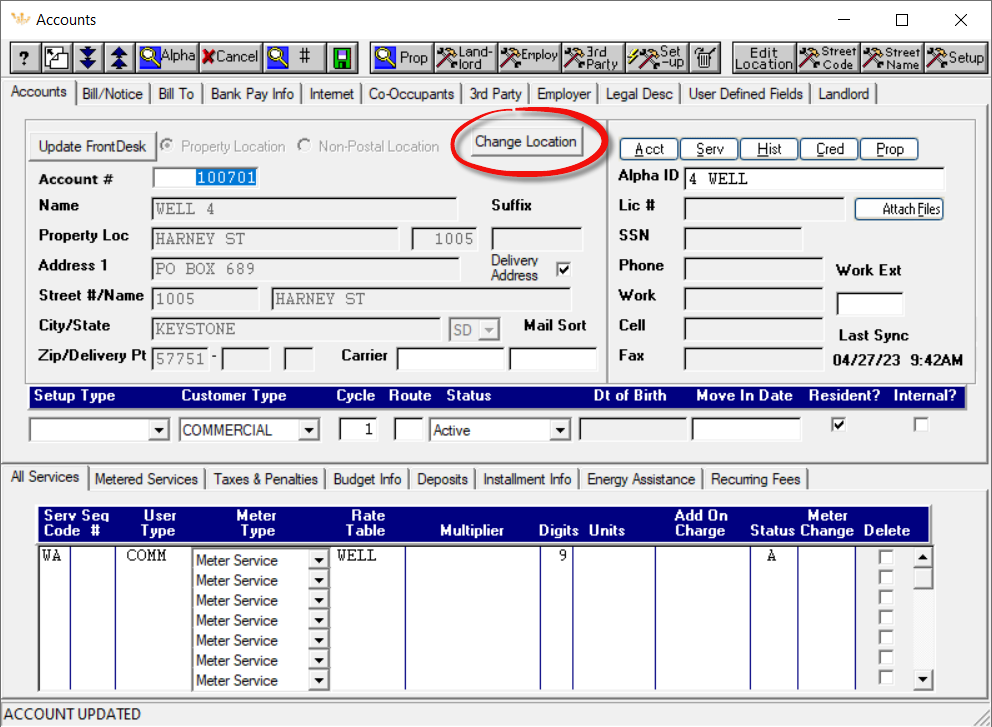
To determine if the Property Location Cleanup has been successfully run, you can bring up the Account Setup screen in UB. If there is a Change Location button at the top center of the Accounts screen, Property Location Cleanup is complete and you do not need to run this process. If there is no Change Location button, follow the steps below to complete this process.
Property Location Cleanup Process
The instructions below will walk you through the process of importing your zip code data and then running the conversion tool.
The file DTZIP4FL.ISM must be in the Data File folder for the below process to work correctly. It should be there by default.
Start up SimpleCity and go to Computer Admin.
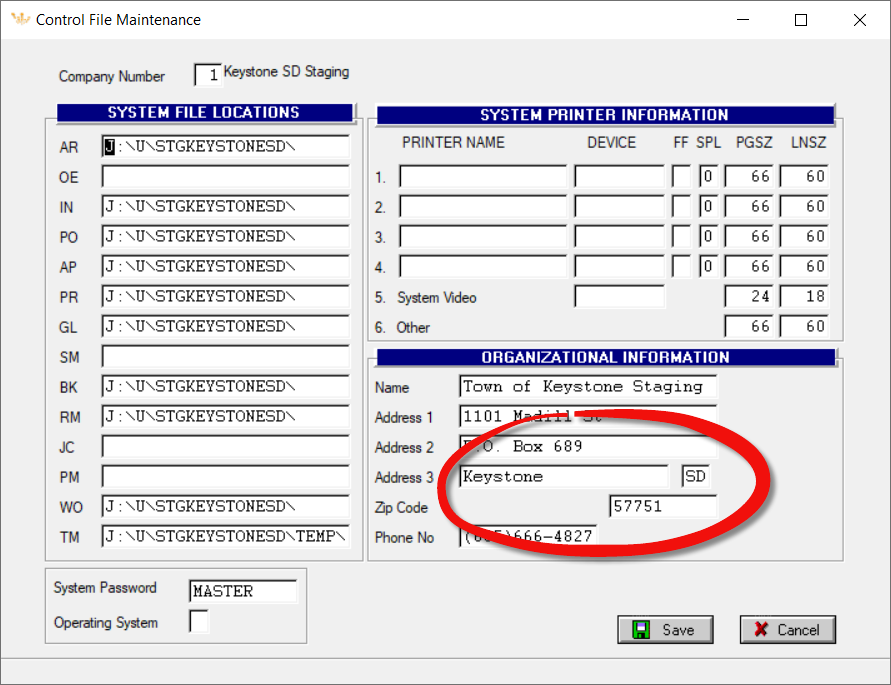
Select Parameter from the Menu and verify the City Name and Zip code are correct.
Select US Postal > Street File Import from the Menu. Verify the City and State are correct. Set Update Locations to No and click Process.
This will generate a report you can review. If the report looks good, complete Step 3 again with Update Locations set to Yes and click Process. We recommend you print the PDF to reference during the next steps.
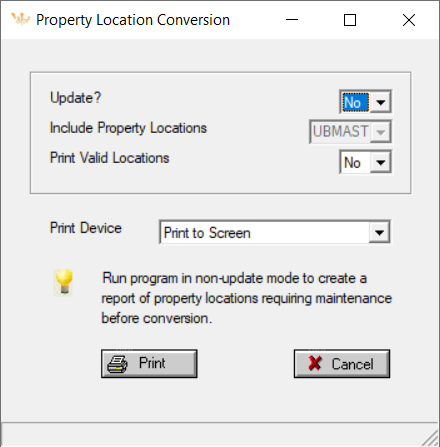
In the SimpleCity Utility Billing module, open Options > Tools > Property Location Conversion.
First, run this report with Update set to No. This will create an "Error File" you can print and review. The Error File will contain all the broken records that need to be fixed. We recommend printing this file to paper or PDF so you have it for reference during the next steps.
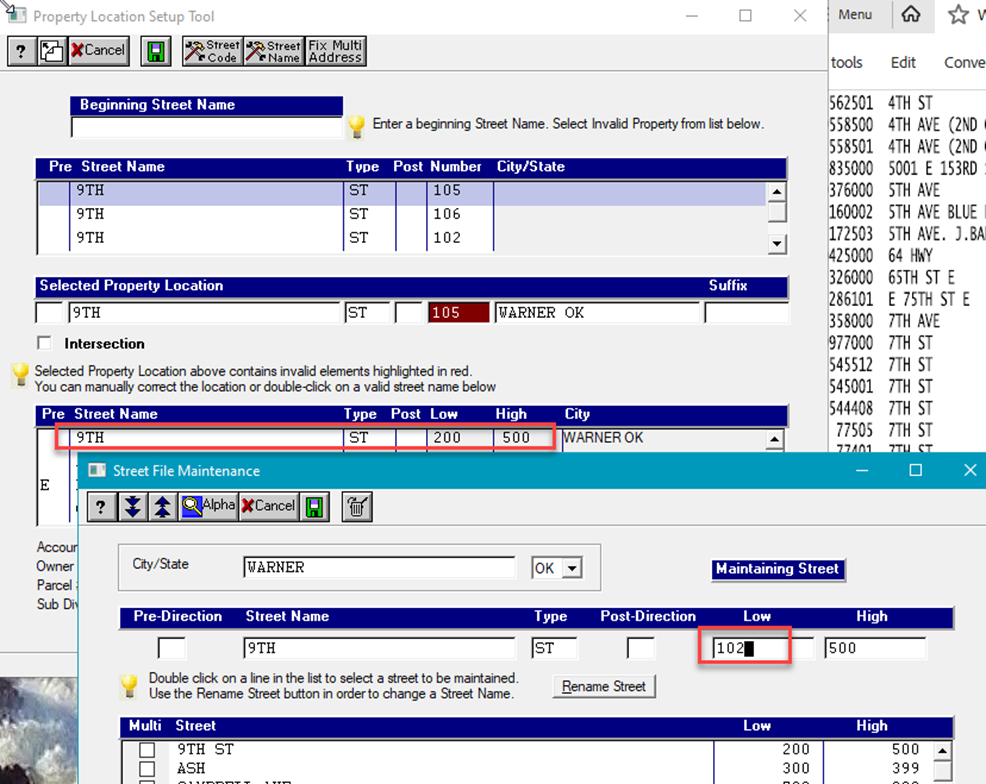
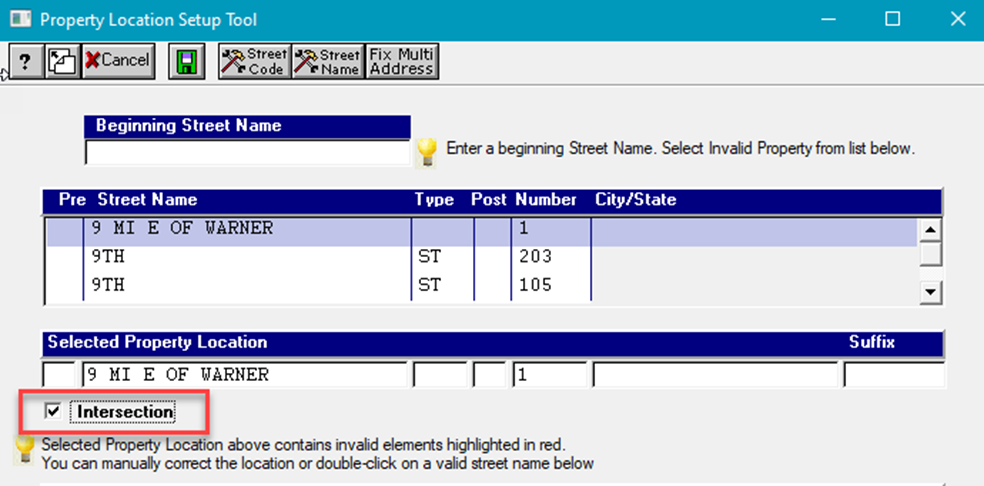
Next, open Options > Tools >Property Location Setup Tool. You'll use this Tool to review and fix the broken Property Location records from the report above. The top section will contain the broken records. You will go through each broken record, make the necessary changes, and then save the changes. As the records are fixed and saved, the next record will scroll to the top. This process will repeat until all records have been fixed. The middle section will display the first record from the top section that you can fix and save. If the record displayed is not a street record, check the Intersection Box. For example, this could contain Ball Field lights, a Concession Stand, etc. The bottom section is from the Street File. This section will show the closest match to the broken record along with suggestions as to how it should be fixed.
To fix the broken records in the top section, follow the steps below.
Manually edit the Record. You can manually edit the record in the middle section to match an existing street and address range. The bottom section contains suggestions, and the printed Street File Import can help by showing all the existing streets in the system. For example, the broken record may have S in the Street Name box, but it should be just S in the Pre-directional box. Or the broken record might have 9TH STREET in the Street Name box but should be 9 in the Name box and ST in the Type box.
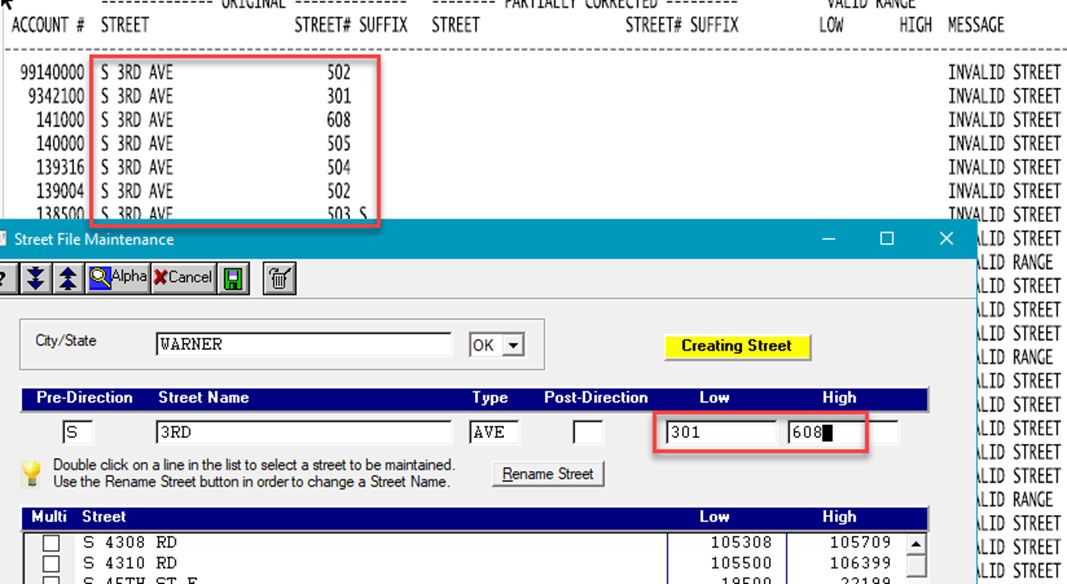
If the Range is Incorrect, you can adjust the address range of a street to include the broken record. Click on the Street Name button to open the Street File Maintenance window. Enter the Pre-direction, Street Name, Type and Post-direction as appropriate. If this matches an existing street, the Low and High Ranges will auto-populate. A blue box will indicate Maintaining Street. Adjust as necessary and click Save. Close the Street File Maintenance screen. If the record is still red, click Tab to move to the next box and it should turn white. Click Save. A fix like this could fix multiple records. Continue clicking Save until you have another red record. Refer to the Property Location Conversion report to see the full list of addresses that should be included in the range update. For example, the 9th St Current Range is 200-500, but we have several addresses in the 100 block. In this case, type in 9th St, click Tab to move to the Low Range, then edit 200 to 102. Click Save.
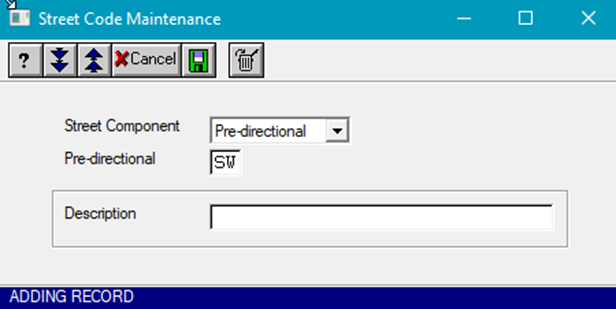
If a Street is missing, you can add a new Street to the Street File. Click on the Street Name button to open the Street File Maintenance window. Enter the desired Pre-direction, Street Name, Type and Post-direction as appropriate. In addition, enter the Low and High Range. Reference the Location Property Conversion report for the needed range. A yellow box will indicate that you are creating a new street. Click Save.You may need to create a new Pre-Direction, Post-Direction, or Street Type before you can create the new Street. Use the Street Code button to create a new record. Click Save. For example, the Pre-direction SW has never been used before, so it needs to be added for a new street.
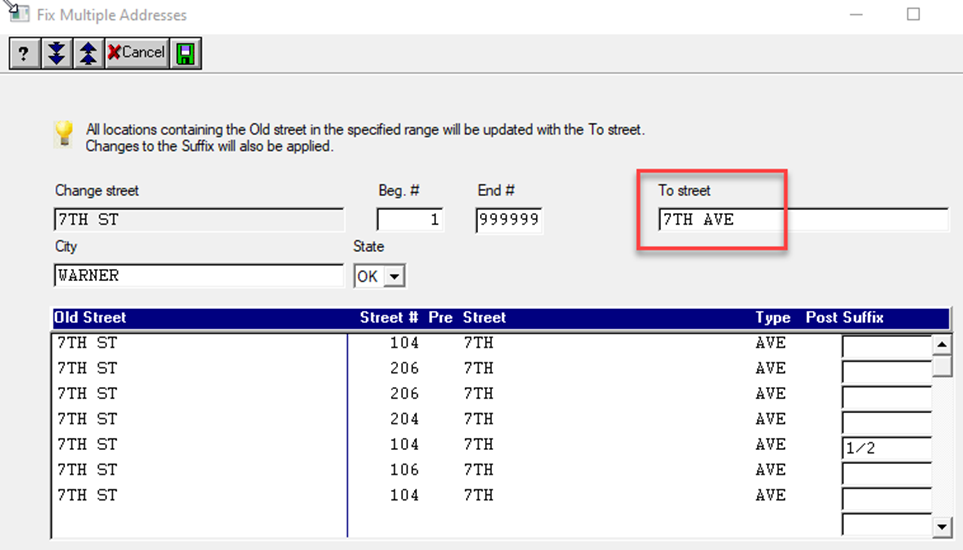
To fix multiple records as a batch, you can use the Fix Multi-Address button to apply the same correction to multiple records. Type in the correct Street Name (Pre-direction, Name, Type, Post-direction), adjust the Beginning and End address range if necessary, and click Save. For example, there is no 7 St in this town. Everything should be moved to 7 Ave.
If the broken record is not a Street Record, check the Intersection Box and Save. For example, this could contain Ball Field lights, a Concession Stand, or any location that is not a real address.
After all the records have been reviewed and fixed, the top section will be empty. Re-run the Property Location Conversion again by repeating step 6 above to ensure all the broken records have been fixed. Make sure Update is still set to No. Scroll to the last page and ensure the Total Number Invalid Records is 0. If any broken records are still displayed, repeat the steps above to fix the records.
Once all the records have been fixed, backup your data.
Next, re-run the report with Yes to complete the process.
Open Computer Admin from your SimpleCity menu. Select Run Program, enter UBPROP00, and click F12. The program will update the locations of all the old and inactive Accounts and enables the Property Location Verification in Utility Billing.
Last, select Run Program, enter UBDTLCCV, and click F12. This program will update the Location file. When the journal shows no errors, the cleanup process is complete
If you get a pop-up about being licensed for Permits, you must un-license the Permits module and re-run the program.
 Updated
by
Janelle Heuton
Updated
by
Janelle Heuton