Accounts Receivable Daily Deposits for Over-the-Counter Payments
 Updated
by
Janelle Heuton
Updated
by
Janelle Heuton
Over-the-counter payments received by cash, check, and credit card, as well as monthly electronic revenue deposited directly into your bank account(s), are posted in Finance Hub > Accounts Receivable. Payments entered in Finance Hub will automatically be assigned receipt numbers and will be printed on the Receipt Report. This document will cover General Ledger and Utility Billing over-the-counter payments. Read the help doc, Electronic Deposits, for further instructions.
AR Daily Deposit Process
The Accounts Receivable Run for over-the-counter checks, cash, and credit card deposits is a simple three-step process. Additional detail on each of these steps is provided below.
- Post Receipts
- Print Receipts (if applicable)
- Create the Receipt Report & Count Down Your Drawer
- Verify the Receipt Report for accuracy
- Fill out your bank deposit slip(s)
- Process your Receipt Run
1. Posting Receipts
In the Finance Hub, select Accounts Receivable > Revenue Posting. The Revenue Posting screen defaults to General Ledger. If you receive payments for other modules, such as Utility Billing, select the module you need at the top right of the screen. After selecting the module you need, click the Post Receipt button.
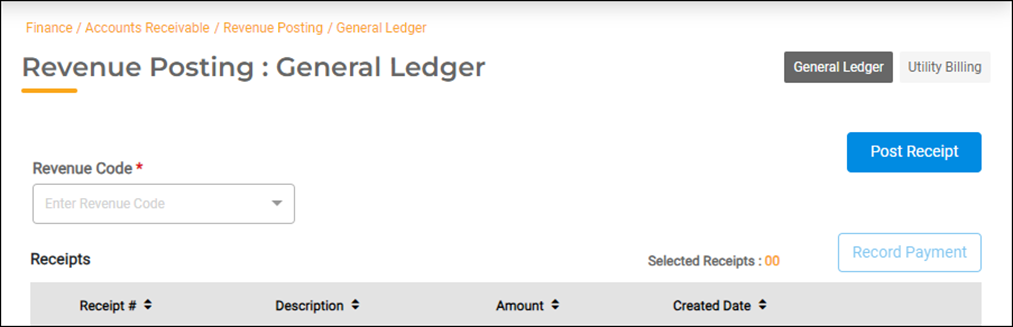
General Ledger Receipts
After selecting General Ledger and clicking the Post Receipt button on the Revenue Posting screen, the Post Receipt screen will display.
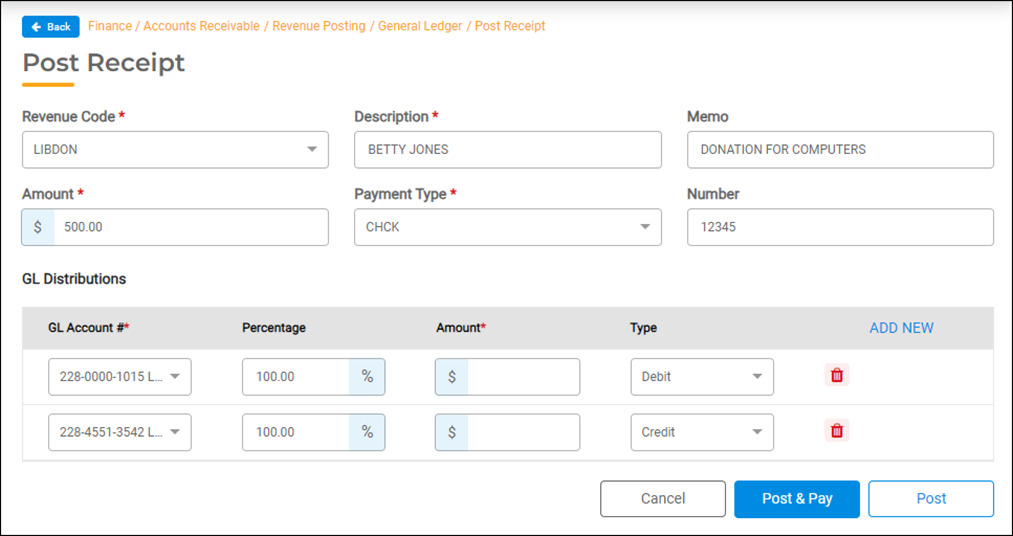
- Select the Revenue Code you need. You can scroll through the drop-down list, or type all or part of the revenue description, such as DONATIONS to select from codes with similar descriptions.
- In the Description field, enter the name of the person, business, or agency you have received the payment from. This description will build historical data in the General Ledger for your government agency and auditor.
- Enter a Memo describing details about the payment. In the following example, the donation received is designated for the purchase of library computers. This description will also build historical data in the General Ledger.
- Enter the payment total that you received in the Amount field.
- Select the Payment Type from the drop-down list.
- If you selected check as the payment type, enter the check number in the Number field.
- Enter Percentages or Amounts in the GL Distributions fields (see the following section for more information).
- Click the Post & Pay or the Post button to save the receipt. Further instructions are provided below.
General Ledger GL Distributions
The debit and credit accounts, pre-determined for the Revenue Code you selected, will default in the GL Distributions section of the Post Receipt screen. You can click ADD NEW to add another account number and click the red trash can to delete an account number. The account Type (Debit/Credit) defaults for the accounts listed.
Revenue Codes are created with or without percentage amounts.
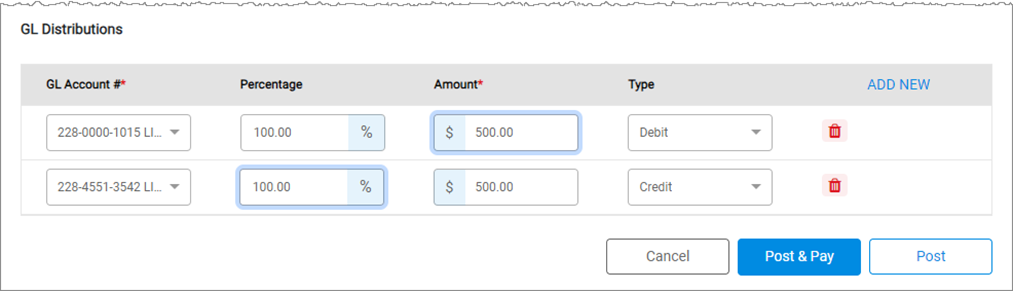
- When Percentage fields are blank, you can manually distribute the total revenue in the Amount fields. The percentages will auto-populate as you enter these amounts.
- When Percentage fields have default values, these values do not act to auto-populate the Amount fields. This allows you to change the percentage amounts if needed. Key in the Percentage amounts and the Amount fields will auto-populate.
- All Credits must add up to 100% of the amount received. All Debits must add up to 100% of the amount received. Additionally, Credit and Debit totals must be equal in each Fund to prevent cross-fund posting.
When, as in the previous example, the GL Distribution is for a single-revenue GL Account number (enter the total received in the Amount fields or enter 100 in the Percentage fields).
The following is an example of GL Distributions for multiple-revenue accounts distributed to two funds.
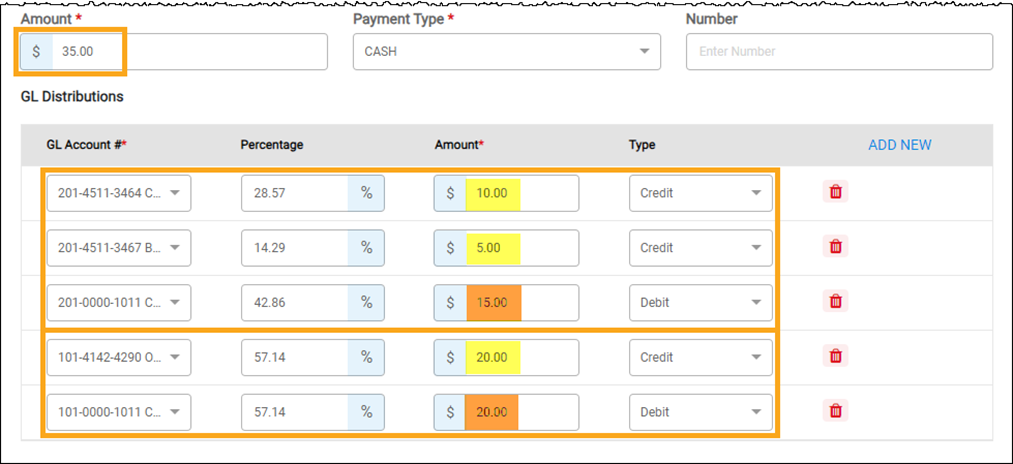
- All Credits: 10.00 + 5.00 + 20.00 = 35.00.
- All Debits: 15.00 + 20.00 = 35.00.
- Debits and Credits per fund: 201 fund’s debits and credits are 15.00 each; 101 fund's debits and credits are 20.00 each.
Utility Billing Receipts
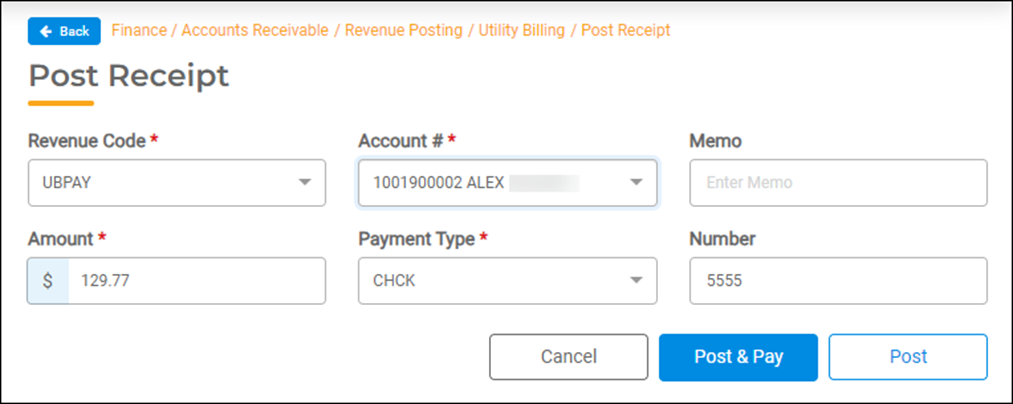
After selecting Utility Billing and clicking the Post Receipt button on the Revenue Posting screen, the Post Receipt screen will display.
- Select the UB Revenue Code you need from the drop-down list.
- In the Account # field, enter the customer’s account number, or type the name of the person, business, or agency you have received the payment from.
- Enter a Memo describing additional details about the payment. This field is not required.
- The account balance will default in the Amount field. Enter the payment total that you received in the Amount field if the payment is different than the account balance.
- Select the Payment Type from the drop-down list.
- If you selected check as the payment type, enter the check number in the Number field.
- Click the Post & Pay or the Post button to save the receipt. Further instructions are provided below.
Saving Receipts using the Post & Pay Method
The Post & Pay button posts the revenue right away and allows you to quickly print a receipt for over-the-counter residents and customers. Use this method if one Revenue Code and one Payment Type are required for posting the payment you received. Once you have clicked the Post & Pay button, you can print the receipt if the person at the counter needs one. See the Printing Receipts instructions below.
Note: You can delete and re-enter a receipt using Post & Pay, but you cannot edit the receipt after posting.
Saving Receipts using the Post Method
The Post button requires an extra step to post the receipts before printing them. Use the Post button when:
- You want the opportunity to edit a receipt before posting it
- You need to create one receipt for multiple payment types (such as a check plus cash)
- You need to create one receipt for multiple revenue codes (such as a dog license and a building permit)
For further instructions on each of the items listed above, see the help doc, Saving Receipts using the Post Method.
Printing Receipts
Once you have posted the payment you can print a receipt if needed.
- Select Accounts Receivable > Receipt Report. The Receipt Report screen defaults to General Ledger. Select the module you need and use the search field to enter a name or revenue code. You can also use the sort arrows in the grey heading bar, and the page filters on the bottom right, to navigate the list of receipts. Click to select the payment.

- Once you have selected the payment, the Receipt Details view will display. You can see more payment details by clicking the arrow next to Payment Details on the bottom left of the screen. Click the PDF button on the right to print the receipt.
2. Print the Receipt Report & Close Out Your Drawer
At the end of each business day, create the Receipt Report and count down your drawer. It is important to verify that the receipts you entered match the cash and checks that you will deposit at your bank(s).
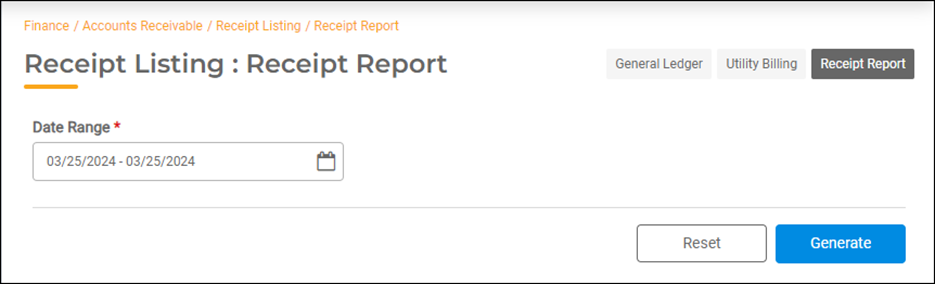
- Select Accounts Receivable > Receipt Listing and click on the Receipt Report button at the top right of the screen. Finance Hub will create an Excel spreadsheet that contains all of the payments you received that day. The spreadsheet is downloaded to your download folder.
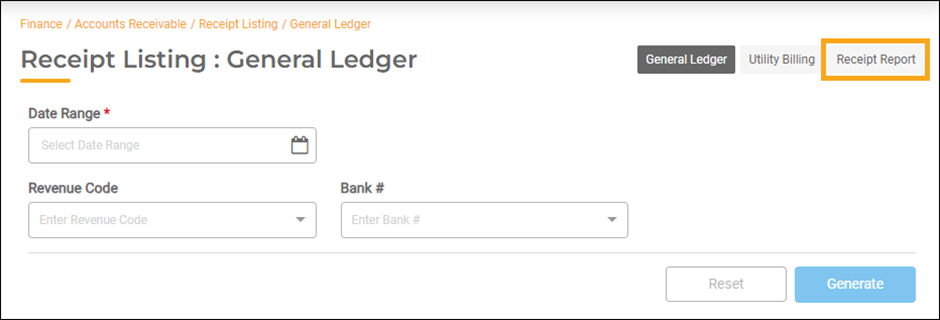
- On the Receipt Report screen, select the current date in the Date Range field, then click the Generate button.
- Find the Excel spreadsheet in your download folder and open it. Create totals by bank and payment type.
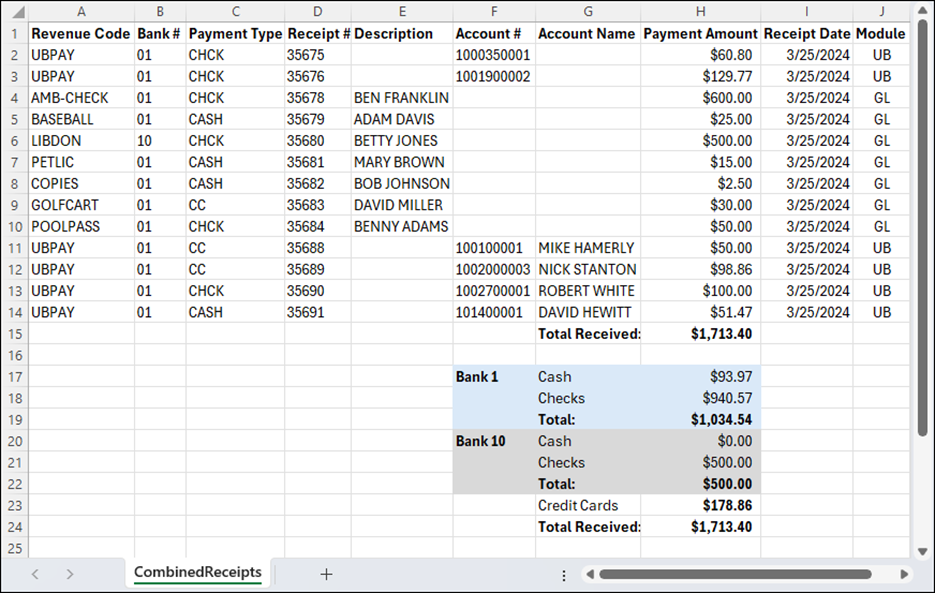
- Count down your drawer and verify that the payment totals on your spreadsheet match the cash and checks that you will deposit at your bank(s). Also, verify against your payment stubs that you have selected the correct accounts, revenue codes, and payment types.
- If they match, prepare your bank deposit slips(s).
- If they do not match and you need to make corrections, read the help doc Maintaining Receipts for further instructions.
3. Processing Your Receipt Run
Once you have verified your deposit is correct, you will need to update receipts by Processing the Receipt Run.
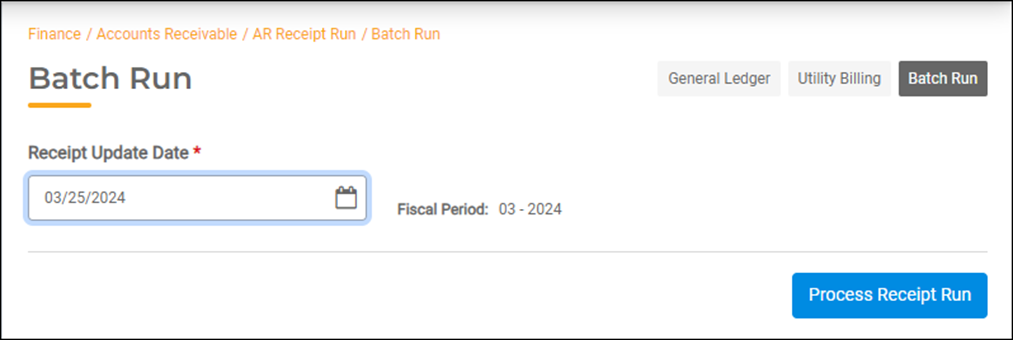
- Select Accounts Receivable > AR Receipt Run. Click the Batch Run button at the top right of the screen.
- Select the current date in the Receipt Update Date field.
- Click the Process Receipt Run button.
- GL Receipts – This process will update the General Ledger and create deposit transactions in Bank Reconciliation right away.
- UB Receipts – Currently, this process will update the Utility Billing accounts, update the General Ledger, and create deposit transactions in Bank Reconciliation at midnight.