How to use Positive Pay
 Updated
by
Janelle Heuton
Updated
by
Janelle Heuton
Positive Pay is an anti-fraud measure offered by some Banks. Within Finance Hub, you can generate a Positive Pay file that can be sent to your bank. The file will contain a report of the outstanding check transactions that have been generated via the Accounts Payable Run. This file informs your bank of the approved checks that have been generated from Finance Hub and tells the bank that these are legitimate transactions that can be processed.
Then when a Vendor deposits a check that was generated via the Accounts Payable process, the Bank will only process that check if it was included on the Positive Pay file. If the transaction is included on the file, the check can be processed and the payment will appear on your Bank Statement to Reconcile. If a check is not included on the file, the bank may prevent it from being deposited by the Vendor and the transaction will not be completed by the Bank.
Positive Pay is included with Finance Hub. If you opt not to use Positive Pay, then checks will be processed without any delay and all completed transactions will be available on your bank statement to reconcile.
Configuring Positive Pay
Positive Pay needs to be configured for each individual bank.
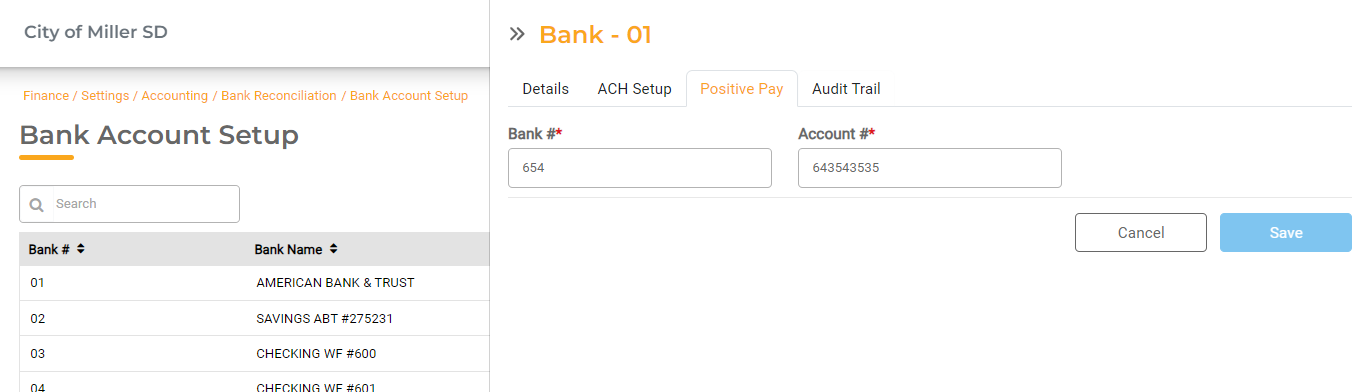
To configure Positive Pay, go to Finance Hub > Settings > Accounting > Bank Reconciliation > Bank Account Setup. Select the Bank you wish to configure for Positive Pay.
- Navigate to the Positive Pay Tab for that Bank.
- Enter the Bank Number. This is a three 3-digit number specific to Positive Pay that your bank will provide.
- Enter the Account Number. If the Account Number is the same as the Account Number in the details tab, you can copy and paste it here
Generating the Positive Pay File
To generate your Positive Pay file, go to Accounting > Bank Reconciliation. This should be done when you are ready to reconcile your Bank Statement.
- Select the Bank for which you want to generate the file. All banks that have Positive Pay configured will appear here.
- Enter the Date Range for the transactions you wish to include. This is an optional field.
- Enter the Check Range you wish to include. This is an optional field.
- Note: If you don't select a Date Range or a Check Range, the file created will contain all Outstanding Checks for the selected Bank.

- Click Generate File to download the Positive Pay file. This is a text file that will contain all transactions with a status of "Outstanding" from the Date Range or Check Number range selected. This can then be sent to the bank for validation.
Once you Reconcile a Payment via the Bank Reconciliation process, that payment will no longer be present in the Positive Pay file the next time it is generated.