How to Create and Run Custom Reports
In Finance Hub, you can easily create and run custom reports by following the steps below:
- Navigate to Finance|Reports.
- Click the Custom Reports tab.
- Enter a name for your report in the Report Name field.
- Choose the Source for the data from the list below.
- GL Accounts: Displays only the Chart of Accounts details, without Journal Entry information. This includes account settings, funds, departments, line items, and other relevant data.
- GL Entries: Displays a list of all General Ledger entries.
- GL Journal Dates: Shows the dates and statuses of journal entries, including the original posting dates and, if applicable, the dates and types of any reversals.
- Bank Transactions: Lists all bank transactions. Use this report to gather detailed information about bank-related activity.
- Accounts Payable Invoices: Displays a list of all invoices from Accounts Payable, along with related information. You can filter by location and by other criteria.
- GL Budget Data: Contains data from annual budget reports for budget-related analysis and tracking.
- GL Receipts: Lists all payments, excluding utility billing payments. Use this report if you cannot find the information in the standard receipt listing.
- UB Receipts: Displays all utility billing payments. Use this if you cannot find specific utility payment details in the regular receipt listing.
- Vendors: Shows vendor-specific information, including addresses, personal details, bank account information, and contact details.
- Click Run Report.
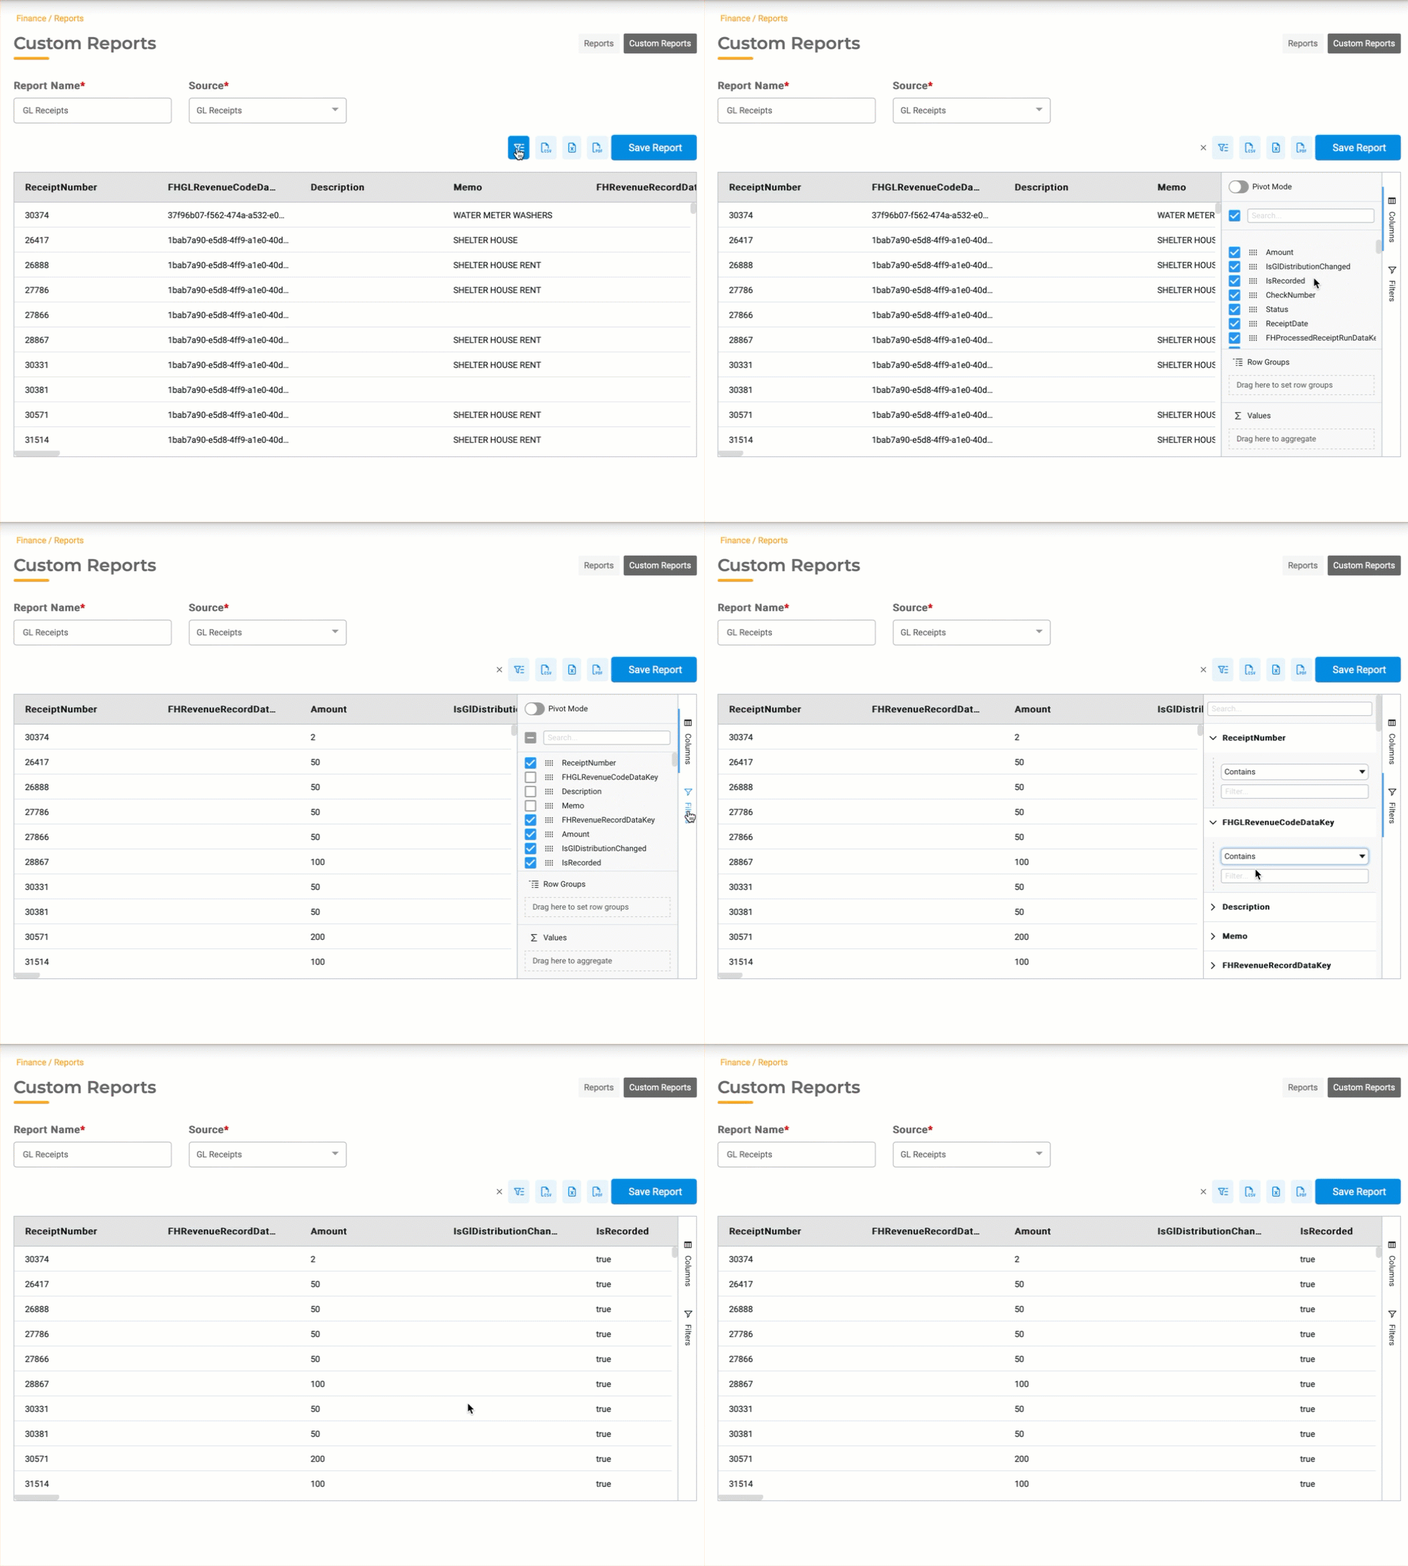
To customize the report:
- Filters: Click the blue filter icon to choose which data to display.
- Columns: Click the Columns tab to hide unwanted columns.
- Data: Click the Filters tab to select the type of data you want and set parameters.

You can save the report as a PDF or a Spreadsheet by clicking the respective icon.
- To save the report for future use, click Save Report. It will appear in the Reports dropdown menu.

